| C H A P T E R 4 |
Running the Samples |
The samples directory under JC_CONNECTED_HOME contains various samples that demonstrate the features of the Java Card API, Connected Edition. The samples include simple web applications, extended applet applications, classic applet applications, and reference applications. Reference applications are blue print-like applications that demonstrate the interactions between various applications on the card using advanced features such as SIO and events.
This chapter describes the procedures for running the samples and contains the following sections:
This section contains the following general procedures that developers can use to run a sample from the command line.
Each sample has a build.xml at the root level of sample folder. This build.xml can be run from command line using the ant tool. To run any sample from command line perform the following steps:
2. Make sure ant can be run from command line.
See Chapter 2 for information about installing and running ant.
3. Verify JC_CONNECTED_HOME is set to the Development Kit home.
| Note - JC_CONNECTED_HOME represents the directory in which the Development Kit was installed. |
If JC_CONNECTED_HOME is not set permanently by using the Windows Control Panel (see Chapter 2), you can temporarily set JC_CONNECTED_HOME by entering the following command:
set JC_CONNECTED_HOME=c:\ path
4. Go to the appropriate sample folder.
This example uses the HelloWorld sample.
The following figure illustrates the command window used to run the HelloWorld sample.

The ant run command starts cjcre.exe in a new command window, loads the built application, and, if used, opens the browser to access the application.
When running, most sample applications open a browser and display a web page that serves as the primary user interface. Follow the instructions for each sample (explained in later sections) to interact with the application.
When running a sample that uses HTTPS to establish a secure connection with a web server, the Firefox browser might report that the sample uses an untrusted certificate and not allow you to accept the certificate required to open the web page. If cjcre.exe is still runing, you can use the browser Certificate Manager to add an exception for the server certificate by performing the folowing procedure.
1. In the browser menu bar, select Tools > Options menu items.
2. In the Options dialog box, select the Advanced icon in the tool bar and click the View Certificates button to open the Certificate Manager.
3. Select the Servers tab and click the Add Exception button.
4. In the Add Security Exception dialog box, enter the URL of the local host that is displayed in the web browser.
For example, https://localhost:50245
5. Click the Get Certificate button and accept the certificate loaded by the Certificate Manager.
In some cases, you may need to restart the browser for the certificate to be accepted.
The following sections describe the individual web application samples contained in the samples\web folder and provide specific procedures used to run them. The following list of samples is ordered based on their complexity with the simplest HelloWorld sample listed first and the more complex CardHolderAuthorization sample listed last:
| Note - See Programming Notes, Java Card 3 Platform, Connected Edition for information about writing web applications that run on the Java Card 3 platform. |
This application demonstrates the basic structure of a Java Card 3 platform application that developers can use to develop, deploy, create, execute, delete, and unload a stand-alone module. It is a minimal application utilizing the simplest source code and meta-files. Refer to the Runtime Environment Specification, Java Card Platform, Version 3.0.1, Connected Edition for details.
This sample contains one web applications that demonstrates using a basic web form to collect and display information provided by the user. The project is located in the JC_CONNECTED_HOME / samples/web folder and is named HelloWorld .
Running the sample consists of using the command-line interface to start the HelloWorld application, entering a name in the web page, clicking the Say Hello button on the page, and then displaying a greeting.
| Note - Using the command line to start a sample is described in Run Samples from the Command Line. |
1. Start the HelloWorld application.
a. Go to the HelloWorld folder.
When running, a browser displays the following page:

2. Enter a name in the Enter Name field and click the Say Hello button.
The browser displays a greeting similar to the following illustration.

This sample demonstrates basic web container authentication with a PIN authenticator using JC-FORM with a Biometric password. Refer to the Runtime Environment Specification, Java Card Platform, Version 3.0.1, Connected Edition for details.
This sample contains a web application that demonstrates running a servlet that requires user authentication to access a web page. The project is located under the JC_CONNECTED_HOME / samples/web folder and is named ContainerManagedAuthentication .
Running the sample consists of using the command-line interface to start the ContainerManagedAuthentication application and login to the page by entering the name admin and password 1234 .
| Note - Using the command line to start a sample is described in Run Samples from the Command Line. |
1. Start the ContainerManagedAuthentication application.
a. Go to the ContainerManagedAuthentication folder.
When running, a browser opens that displays the following dialog:

2. Click the AuthServlet hyperlink.
The browser displays the login page.
3. Enter the following values in the login dialog:


This sample demonstrates secure hosting with user access on a static port. The sample contains one web application that accesses a secure website hosted on a static port defined by the sample’s manifest.mf file. Each time the application is run, access to the web site is made through this port. Refer to the Runtime Environment Specification, Java Card Platform, Version 3.0.1, Connected Edition for details. The project is located under the JC_CONNECTED_HOME / samples/web folder and is named StaticSecureWebHosting .
Running the sample consists of using the command-line interface to start the StaticSecureWebHosting application, check the website’s security certificate, and display the web page.
| Note - Using the command line to start a sample is described in Run Samples from the Command Line. |
1. Start the StaticSecureWebHosting application.
a. Go to the StaticSecureWebHosting folder.
| Note - If the browser displays a warning that the security certificate is not issued by a trusted certificate authority, disregard it and choose to continue to the web site. The security certificate for this sample is used for demonstration purposes only and cannot be used for developing deployable samples. If you are unable to continue to the web page, perform the procedure described in Accepting an Untrusted Certificate. |
The browser displays the Secure hosting static port entry page.

2. Enter a name in the Name field and click the Say Hello button.
The browser displays the static port web page.

This sample demonstrates secure hosting with user access on a dynamic port. The sample contains one web application that accesses a secure website hosted on a dynamic port determined by the Java Card 3 platform. Each time the application is run, the Java Card 3 platform determines the port used to access the website. Refer to the Runtime Environment Specification, Java Card Platform, Version 3.0.1, Connected Edition for details. The project is located under the JC_CONNECTED_HOME / samples/web folder and is named DynamicSecureWebHosting .
Running the sample consists of using the command-line interface to start the DynamicSecureWebHosting application, check the website’s security certificate, and display the web page.
| Note - Using the command line to start a sample is described in Run Samples from the Command Line. |
1. Start the DynamicSecureWebHosting application.
a. Go to the DynamicSecureWebHosting folder.
| Note - If the browser displays a warning that the security certificate is not issued by a trusted certificate authority, disregard it and choose to continue to the web site. The security certificate for this sample is used for demonstration purposes only and cannot be used for developing deployable samples. If you are unable to continue to the web page, perform the procedure described in Accepting an Untrusted Certificate. |
The browser displays the Secure hosting dynamic port entry page.

2. Enter text in the name field and click the Say Hello button.
The browser displays a greeting page that uses the text entered in the name field.
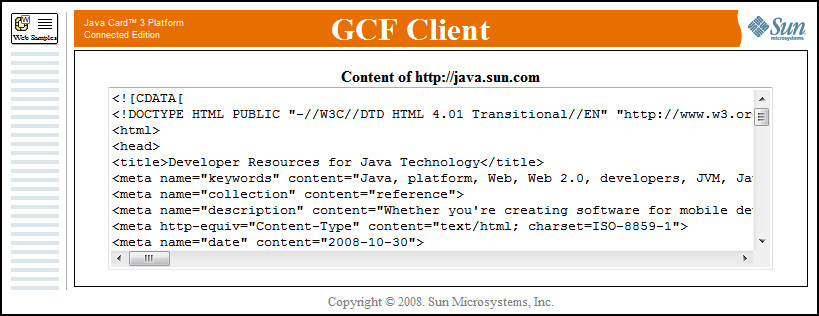
The GCF application demonstrates the Generic Connection Framework (GCF) functionality. Refer to the Runtime Environment Specification, Java Card Platform, Version 3.0.1, Connected Edition for details.
Running the sample consists of using the command-line interface to start the GCFClient application, entering a URL (such as http://www.sun.com ) in the URL field, and then clicking the Get Content button on the page to display the contents of the web page.
| Note - Using the command line to start a sample is described in Run Samples from the Command Line. |
1. Start the GCFClient application.
a. Go to the GCFClient folder.
When running, a browser opens and displays the GCF Client Page.

2. Enter a URL in the URL field and click the Get Content button.
The application establishes an http connection with the website and displays content from the web site in the browser.
| Note - The sample works correctly only when a URL field contains a URL in a full form (such as http://www.sun.com ). The sample does not work when the URL is provided in an abbreviated form (such as www.sun.com) . |
This sample demonstrates dynamic class loading using the Class.forName() method. The sample contains one web application that displays a web form enabling the user to enter a text string and to select a greeting type from a dropdown list. The application displays a text string that concatenates the greeting type with the text string entered by the user. Refer to the Runtime Environment Specification, Java Card Platform, Version 3.0.1, Connected Edition for details. The project is located under the JC_CONNECTED_HOME / samples/web folder and is named DynamicallyLoadedClasses .
Running the sample consists of using the command-line interface to start the DynamicallyLoadedClasses application, entering text in the web page Name field, and clicking the Greet button to display the greeting page.
| Note - Using the command line to start a sample is described in Run Samples from the Command Line. |
1. Start the DynamicallyLoadedClasses application.
a. Go to the DynamicallyLoadedClasses folder.
When running, a browser opens and displays the Dynamically Loaded Classes page.

2. Enter a name in the name field, select a greeting, and click the Greet button.
The browser displays text that consists of the greeting type and the name entered in the name field.

This sample demonstrates the persistence of user entered information when a session on a card is resumed. The sample stores user-entered information as history and, when the card resumes functioning, the previous entries are made available. Refer to the Runtime Environment Specification, Java Card Platform, Version 3.0.1, Connected Edition for details.
Running the sample consists of using the command-line interface to start the Persistence application, clicking the hyperlink on the Persistence web page to open the database form, using the form to add and delete items in the database list, and stopping and restarting the server. When the server is stopped and restarted the items in the list should not change.
| Note - Using the command line to start a sample is described in Run Samples from the Command Line. |
1. Start the Persistence application.
a. Go to the Persistence folder.
When running, a browser opens that displays the Persistence page.

2. Click the Database hyperlink.
The browser displays the database entry form.
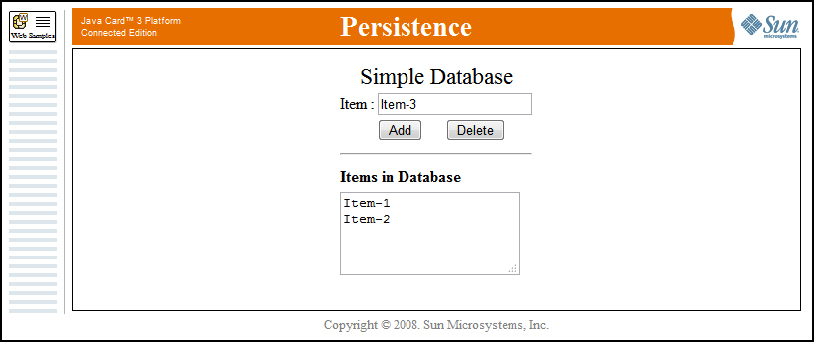
3. Enter text in the Item field and click the Add button.
The browser displays the added text in the Items in Database list. The following figure illustrates an entry form with two items added to the list.
4. Delete an item from the list.
a. Type the name of the item into the Item text field.
The item is removed from the Items in Database list.
5. Stop and resume the server.
a. In the cjcre.exe . window, kill the server by using ctrl + C .
b. Open a new Command Prompt window and navigate to the JC_CONNECTED_HOME\bin directory.
c. Restart the server from the new window by using, cjcre.exe -resume .
6. Verify that the content in the database list is unchanged.
7. Add a new item to the list to verify that the database is still functional.
This sample demonstrates how a registered task can be automatically available after the card is reset. The sample registers a task that serves data via an HTTP connection to the client. Refer to the Runtime Environment Specification, Java Card Platform, Version 3.0.1, Connected Edition for details.
This sample contains two web applications that demonstrate a registered task that is available after the card is reset. The projects are located under the JC_CONNECTED_HOME / samples/web/RestartableTasks folder. One project is named InfoClient and the other project is named InfoServer .
Running the RestartableTasks sample consists of using the command-line interface to start the InfoClient application and the InfoServer application, and clicking the Register Ping Service hyperlink to display the JCPingServer page. The server is stopped and restarted and the JCPingServer page.
| Note - Using the command line to start a sample is described in Run Samples from the Command Line. |
1. Start the InfoServer application.
a. Go to the InfoServer folder.
When running, a browser opens and displays the Restartable Tasks page.

2. Click the Register Info Service link in the web page to start the JCInfoServer and display the server page.

3. Start the InfoClient application.
Each time the InfoClient application runs, the hit number is incremented in the output and a different text message is displayed.
4. Stop and resume the server.
a. In the cjcre.exe . window, kill the server by using ctrl + C .
b. Open a new Command Prompt window and navigate to the JC_CONNECTED_HOME\bin directory.
c. Restart the server from the new window by using, cjcre.exe -resume .
5. Run the InfoClient application.
The hit number in the output text continues to increment from the previous value.
The Transactions sample application contains a module that performs updates and either commits the transaction gracefully or aborts by throwing exception within code to simulate rollback. Refer to the Runtime Environment Specification, Java Card Platform, Version 3.0.1, Connected Edition for details.
This sample contains a web application that demonstrates the event mechanism. The Transactions project is located under the JC_CONNECTED_HOME / samples/web folder.
Running the Transactions sample consists of using the command-line interface to start the Transactions application, entering data in the Transactions web page and clicking the Set Value button on the page to commit the transaction.
| Note - Using the command line to start a sample is described in Run Samples from the Command Line. |
1. Start the Transactions application.
a. Go to the Transactions folder.
When running, a browser opens and displays the Transactions page.
2. Enter a set of characters in the New Value field and mark the Crash? checkbox.
The browser displays a page containing the contents of the value field. The page is similar to the following.

3. Click the Set Value button.
The browser displays a page containing an exception message with the contents of the value field. The page is similar to the following.

4. In the Transactions page, enter a set of characters in the Value field, do not mark the Crash? checkbox, and click the Set Value button.
The browser displays the Transactions page with the Current Value updated to the new value.
This sample demonstrates inter-application communication using shared interface objects (SIOs). One servlet updates a shared object while the other can read updated values. Refer to the Runtime Environment Specification, Java Card Platform, Version 3.0.1, Connected Edition for details.
This sample contains two web applications that demonstrate inter-application communication using SIOs. The projects are located under the JC_CONNECTED_HOME / samples/web/SIOFacility folder. One project is named SIOservice and the other project is named SIOclient .
Running the SIOFacility sample consists of using the command-line interface to start both the SIOservice application and the SIOclient application, entering values in the SIO Service web page, clicking the Set Value button on the page, and then using a hyperlink on the SIO page to display a list of received events.
| Note - Using the command line to start a sample is described in Run Samples from the Command Line. |
1. Start the SIOService application.
a. Go to the SIOService folder.
When running, a browser opens that displays the SIO Service page.
2. Enter a value in the New Value field and click the Set Value button.
The browser displays a page with the new value set.

3. Use the command line to start the SIOClient application.
When running, a browser opens that displays the SIO Client page.

4. Click the link in the servlet page to display the SIO value.
The value displayed on the page is the same as that set in the SIO Service page.

This sample demonstrates an Event facility containing two servlets, in which the first servlet registers a listener for events fired by another application. Refer to the Runtime Environment Specification, Java Card Platform, Version 3.0.1, Connected Edition for details.
This sample contains two web applications that demonstrate the event mechanism. The projects are located under the JC_CONNECTED_HOME / samples/web/EventFacility folder. One project is named EventSender and the other project is named EventListener .
Running the EventFacility sample consists of using the command-line interface to start both the EventListener application and the EventSender application, entering data in the Event Sender web page, clicking the Fire Event button on the page, and then using a hyperlink on the Event Listener page to display a list of received events.
| Note - Using the command line to start a sample is described in Run Samples from the Command Line. |
1. Start the EventListener application.
a. Go to the EventListener folder.
When the sample is running, a browser opens and displays the following web page containing a hyperlink to the List of Received Events.

2. Start the EventSender application.
Depending on the browser settings, the application opens a new browser window or a new tab and displays the following Event Sender form:

3. Enter some text in the Data field and click the Fire event button.
The browser displays a page with the new text.

4. In the Event Facility Listener page, click the List of Received Events hyperlink.
The application displays the following list of events fired by the custom event servlet:

This sample demonstrates how the authentication of a card holder to a locally accessible servlet grants a non-card holder access to a remotely accessible servlet. Card-holder-user authentication is tracked globally (card-wide). Authorization to access resources is protected by globally authenticated card-holder-user identity. Authorization to access resources can be granted by the card holder to other users. Refer to the Runtime Environment Specification, Java Card Platform, Version 3.0.1, Connected Edition for details.
In this sample, servlets ( CardHolderApp and RemoteUserApp ) run on a local desktop that is networked with a remote desktop. After CardHolderApp is deployed and instantiated on the local desktop, the remote user attempts but fails to access RemoteUserApp on the local desktop.
After the login attempt fails, the card holder uses the CardHolderApp on the local desktop to authenticate and enable the remote user to access the RemoteUserApp on the local desktop.
In this sample, the URL for the RemoteUserApp is
http:// IP Address : 8020/ RemoteUserApp and the URL for the CardHolderApp is http://localhost:8020/CardHolderApp .
| Note - Using the command line to start a sample is described in Run Samples from the Command Line. |
1. Start the CardHolderApp application.
a. Go to the CardHolderApp folder.
The browser displays the Card Holder App page.

2. Start the RemoteUserApp application.
a. Go to the RemoteUserApp folder.
The browser displays the Remote User’s App page.
3. From a remote workstation or PC networked with the platform running the sample, open a browser and enter the following URL:
URL: http:// IP Address : 8019/remoteuserapp
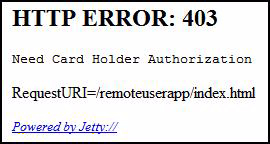
This action is performed as a remote user who is attempting to access the Remote User’s App page. The attempt fails and the browser displays an HTTP error 403 page in the browser stating that card holder authorization is required.
4. In the Card Holder App page, click the Authorize Remote User hyper link and enter the following login and password:
This action is performed as the card holder. The sample displays the authorization page in the browser.

5. From the remote workstation or PC, either refresh the browser page displayed in step 2 or enter the URL from Step 3 in a new browser page.
The sample displays the Remote User page in the browser.
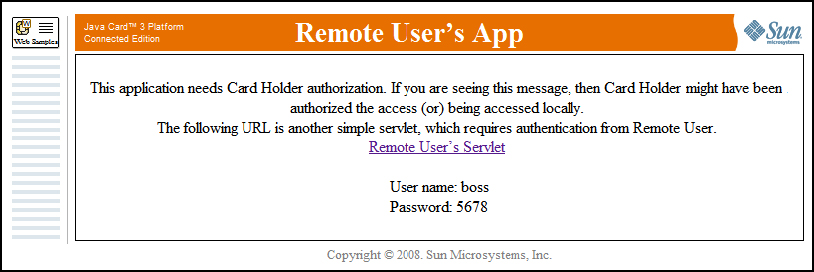
6. In the Card Holder App page, click the Remote User’s Servlet hyper link and enter the following login and password:
7. This action is performed as the remote user. The sample displays a Welcome Remote User page in the browser.

The following section describes the classic applet sample contained in the samples\classicapplets folder and provides the procedure used to run it.
The ClassicChannels sample demonstrates the behavior of Java Card technology-based logical channels by showing how two applets that interact with each other can each be selected for use at the same time.
The applets may use a contact or contactless interface for communication with the terminal. The ClassicChannels sample demonstrates the selection of an applet on both interfaces. The sample also demonstrates use of ExtendedLength APDU.
The ClassicChannels sample mimics the behavior of a wireless device connected to a network service. A connection manager tracks whether the device is connected to the service and whether the connection is local or remote.
While it is connected, the user’s account is debited on a unit of time basis. The debit rate is based on whether the connection is local or remote, and uses either the contacted or contactless interface.
The sample employs two applets to simulate the behavior of logical channels:
When the user turns on the device, the ConnectionManager applet is selected. The ConnectionManager implements the ExtendedLength interface to handle APDUs with larger data segments such as the ones used for key exchange in the sample. Every unit of time the terminal sends a message containing the area code to the card.
When the user wants to use the service, the AccountAccessor applet is selected on another logical channel so that the terminal can query the balance. The AccountAccessor can return the balance only if the ConnectionManager is active. The ConnectionManager applet sets the connection and tracks the connection status. Based on the value of an area code variable, the ConnectionManager determines whether the connection is local or remote. It also determines whether the connection is contacted or contactless. AccountAccessor uses this information to debit the account at the appropriate rate. The connection is disabled when the user completes the call or when the account is depleted.
1. Start the ClassicChannels application.
a. Go to the ClassicChannels folder.
The ant script either generates the default output file, default.out or the output file name specified in the command line. To specify the name of the output file use the following command:
ant - Dredirect.output =outputfile_name target
In this command, outputfile_name represents the name of the output file and target represents either the all or run options of the ant command. In this case, the run target is used. This command redirects the output from the APDUtool execution to the outputfile_name file.
2. Verify that the contents of the output file created by the ant run command are the same as the contents of the ClassicChannels.expected.out file.
This release includes two extended applet samples in samples/extended_applets that illustrates the use of the Java Card API, scenarios of package masking, and post-manufacture installation.
This section consists of the following sections:
Version 3.0.1 of the Development Kit includes the HelloWorld extended applet sample.
Ant script files are provided to build the samples, demonstration masks, and cjcre .
See Programming Notes, Java Card 3 Platform, Connected Edition for additonal information about creating extended applets.
This sample demonstrates the basic structure of a Java Card 3 platform extended applet that developers can use to develop, deploy, create, execute, delete, and unload extended applets. It is a minimal extended applet utilizing the simplest source code and meta-files. Refer to the Runtime Environment Specification, Java Card Platform, Version 3.0.1, Connected Edition for details.
This sample contains one project that demonstrates the function of an extended applet. The project is located in the JC_CONNECTED_HOME / samples/extended_applets folder and is named HelloWorld .
Running the sample consists of using the command-line interface to start the HelloWorld extended applet. When running, the project installs the extended applet, processes an incoming APDU, and responds with a text greeting.
| Note - Using the command line to start a sample is described in Run Samples from the Command Line. |
1. Start the HelloWorld application.
a. Go to the HelloWorld folder.
The ant script either generates the default output file, default.out or the output file name specified in the command line. To specify the name of the output file use the following command:
ant - Dredirect.output = outputfile_name target
In this command, outputfile_name represents the name of the output file and target represents either the all or run options of the ant command. In this case, the run target is used. This command redirects the output from the APDUtool execution to the outputfile_name file.
2. Verify that the contents of the output file created by the ant run command are the same as the contents of the HelloWorld.expected.out file.
This sample demonstrates the basic structure of a Java Card 3 platform extended applet that developers can use to develop, deploy, create, execute, delete, and unload extended applets. It is a minimal extended applet utilizing the simplest source code and meta-files. Refer to the Runtime Environment Specification, Java Card Platform, Version 3.0.1, Connected Edition for details.
This sample contains one project that demonstrates the function of an extended applet. The project is located in the JC_CONNECTED_HOME / samples/extended_applets folder and is named ExtendedChannels .
Running the sample consists of using the command-line interface to start the ExtendedChannels extended applet. When running, the project installs the extended applet, processes an incoming APDU, and responds with a text greeting.
| Note - Using the command line to start a sample is described in Run Samples from the Command Line. |
1. Start the ExtendedChannels application.
a. Go to the ExtendedChannels folder.
The ant script either generates the default output file, default.out or the output file name specified in the command line. To specify the name of the output file use the following command:
ant - Dredirect.output = outputfile_name target
In this command, outputfile_name represents the name of the output file and target represents either the all or run options of the ant command. In this case, the run target is used. This command redirects the output from the APDUtool execution to the outputfile_name file.
2. Verify that the contents of the output file created by the ant run command are the same as the contents of the ExtendedChannels.expected.out file.
This release includes a sample reference application in samples/reference_apps that illustrate the use of the Java Card API, scenarios of package masking, and post-manufacture installation.
This section consists of the following sections:
Version 3.0.1 of the Development Kit includes the Transit reference application sample.
The each application in the Transit sample contains a build.xml at its root level folder. Developers can use build.xml with the ant tool to build a sample application without running it.
To build a sample application without running it, use the Command Prompt window to navigate to the appropriate application directory and enter the ant command. For example, to build the ClassicWalletApplet sample application without running it, navigate to the ClassicWalletApplet folder and enter the following command:
ant
The ant tool runs the tools (compiler and Packager) required to build the sample application. It displays a build status message at completion of the task.
See Programming Notes, Java Card 3 Platform, Connected Edition for detailed information about the Transit sample.
The Transit sample is run by building and running individual Transit sample applications in the following sequence:
A RunTransit.bat batch file is provided in the Transit directory that automatically builds and runs the Transit sample applications in their proper sequence. When running the sample with the RunTransit.bat file, use the following procedures for performing the actions that are web-page based.
See General Procedures for Running Samples for a description of the steps performed in running a sample.
| Note - The POSWeb application has been internationalized and can be localized for the French language. FIGURE 4-1 illustrates the language setting screen in Firefox. FIGURE 4-2 and FIGURE 4-3 are examples of two POSWeb sample screens as they appear when localized for the French language. |
FIGURE 4-1 Browser Language Selection Dialog
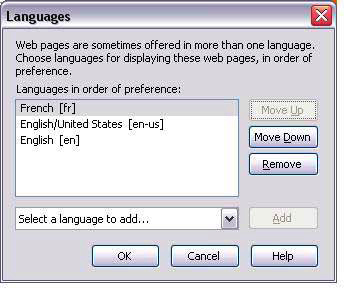
FIGURE 4-2 Example of French Language Version of the Transit Point of Sale Page
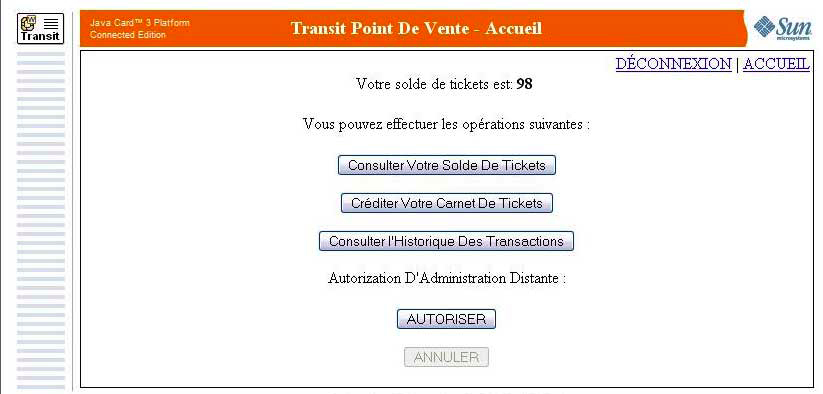
FIGURE 4-3 Example of French Language Version of Transit History Page

| Note - See General Procedures for Running Samples for a general description of the steps performed in running a sample. |
1. Run the WalletClassicLib sample application.
a. Go to the WalletClassicLib folder.
Verify that a second terminal window opens, cjcre.exe starts, and the the first window displays, Build Successful .
| Note - Do not close the cjcre.exe window. |
2. Run the TransitExtLib sample application.
a. Go to the TransitExtLib folder.
Verify that a second terminal window opens, cjcre.exe starts, and the the first window displays, Build Successful .
| Note - Do not close the cjcre.exe window. |
3. Run the ClassicWalletApplet sample application.
a. Go to the ClassicWalletApplet folder.
Verify that the applet was successfully created. The SELECT APDU command returns success status word 90 00. Additional APDU commands are used to credit the Wallet additional $100 (0x64). Verify that these commands return success status words 90 00.
4. Run the WalletAssistApplet sample application.
a. Go to the WalletAssistApplet folder.
Verify that the applet was successfully created. The SELECT APDU command returns Status word 69 99.
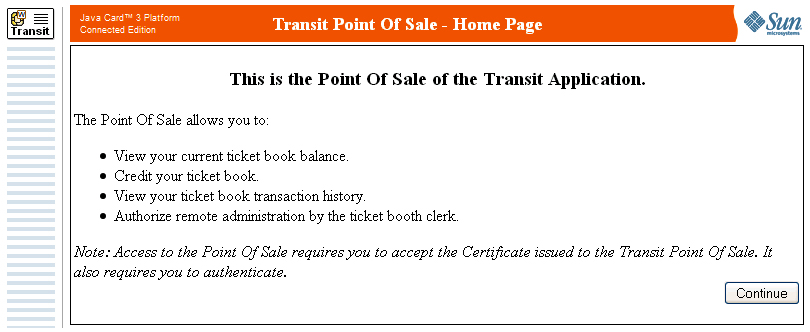
5. Run the POSWeb sample application.
The browser opens and displays the following page:
c. Click the Continue button and in the login screen, enter the User Name and PIN as:
| Note - If the browser displays a warning that the security certificate is not issued by a trusted certificate authority, disregard it and choose to continue to the web site. The security certificate for this sample is used for demonstration purposes only and cannot be used for developing deployable samples. If you are unable to continue to the web page, perform the procedure described in Accepting an Untrusted Certificate. |
The browser displays transaction page.
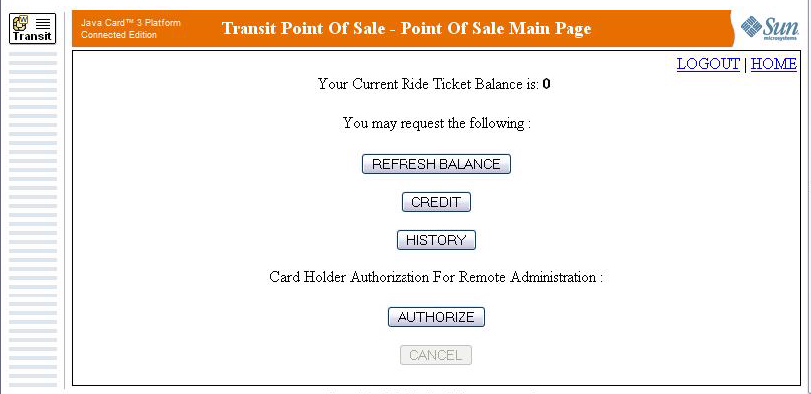
The browser displays the Credit Request page.

e. Enter a number in the field and click the SUBMIT button.
The page displays the credited amount, in this example 100.
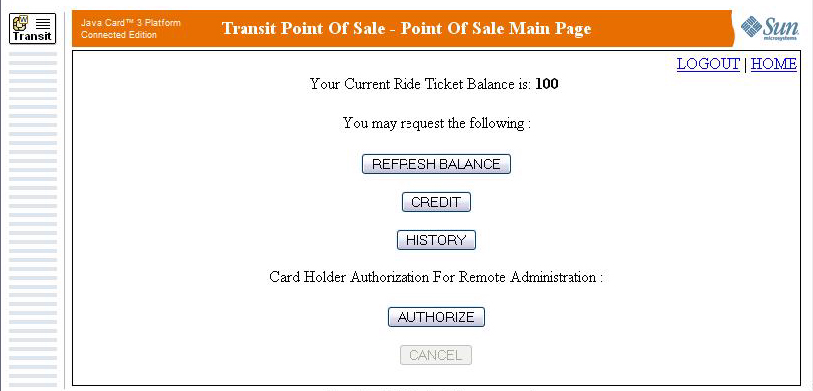
f. Click the AUTHORIZE button.
This authorizes access to the Admin application from a non-trusted client (the Internet Explorer browser in this RI). Clicking the CANCEL button (when enabled) cancels remote authorization.

6. Run the AdminWeb sample application.
The Administration login page is displayed.
| Note - If the browser displays a warning that the security certificate is not issued by a trusted certificate authority, disregard it and choose to continue to the web site. The security certificate for this sample is used for demonstration purposes only and cannot be used for developing deployable samples. If you are unable to continue to the web page, perform the procedure described in Accepting an Untrusted Certificate. |
c. In the login screen, enter the login User Name and PIN as:

The browser displays the Administration page.

7. Run the TurnstileApplet sample application.
a. Go to the TurnstileApplet folder.
The log window displays a 90 00 in select response.
c. Return to the AdminWeb page and click the UNBLOCK button.
8. Clean and build the TurnstileClient .
a. Go to the TurnstileClient folder.
b. Enter the ant command (builds without running TurnstileClient ).
9. Open TurnstileClient properties and set the run line argument:
-k 0102030405060708 PROCESS_ENTRY 999 PROCESS_EXIT 123
10. Run the TurnstileApplet sample application.
The Output window displays 90 00 completes and SUCCESSFULL.
11. In the Transit Point of Sale Main Page, click the REFRESH BALANCE button.
The balance displays 2 less - 98.
12. Run the TurnstileWeb sample application.
a. Go to the TurnstileWeb folder.
The browser opens and displays the Transit Turnstile Home Page.
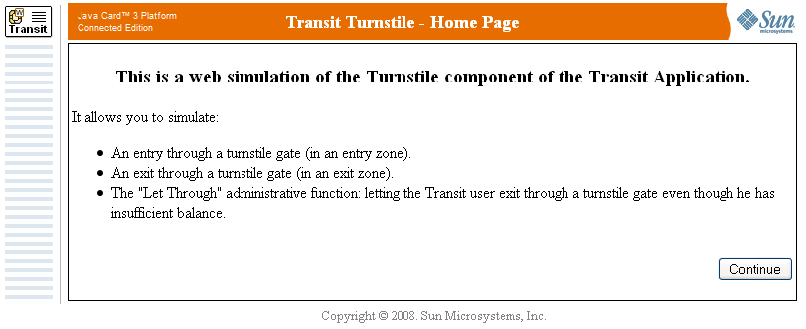
The browser displays the Entry page.

d. Return to the Transit Administration Main Page and click the UNBLOCK button.
e. Select Zone 1 and click the ENTER button.
The browser displays the Transit Turnstile Exit page.

g. Click the HISTORY button on the Transit Point of Sale Main Page.

Copyright © 2009 Sun Microsystems, Inc. All rights reserved.