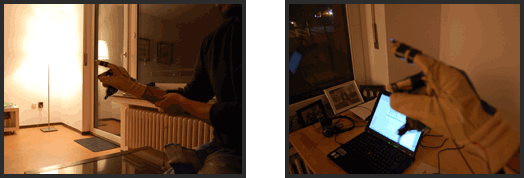
What is this ?

This project is a re-implementation of the Low-Cost Multi-point Interactive Whiteboards Using the Wiimote as defined by Johnny Chung Lee. Since the Wiimote can track sources of infrared (IR) light, it is possible to track pens that havean IR led in the tip. By pointing a wiimote at a projection screen or LCD display, one can create very low-cost interactive whiteboards or tablet displays.

We created a set of IR pens and also played around with new ways of tracking our fingers by wearble gloves. Our interest was to include more than just pointing capabilites and allowing a user to click.


Making an IR Pen

In the weekend we built an Infra Red Pen to use it for the Wii White board application. We used a basic set of parts we got from a general electronic shop(CONRAD). To make one pen, you need:

  • One Infra Red LED
  • A pair of AAA batteries
  • A 30 ohm Register
  • A push-button switch
  • Some wires
  • And souldering equipment

  • The general constrcition should be in the following order:


    There are several ways to make this pen. A good way is to use a hard covering (e.g. take a board marker) and build the parts into it. This might require some drilling and be diffcult to assemble it in a good shape. It is also relatively hard to plug in the batteries into a marker or to change them at a later point of time.

    The second way, we used was to wrap the batteries in plain paper and add the LED on tip and the siwtch at the back. This was not such a good idea since the Wii remot could hardly pick up the signal from the LEDs in the fornt. To solve this, we placed the button in the front to allow, touching the screen and the IR LED at the back so that it can face the Wii remote directly at all times. This increases the possibility of detecting the IR greatly.

    The third version is to have the LED on the tip but sticking out of the pen (from side). This is an enhanced version of the first IR Pen but eaiser to construct. And sicne it was wrapped it in duct tape, it was very solid and one-peice. Here is what we came up with:
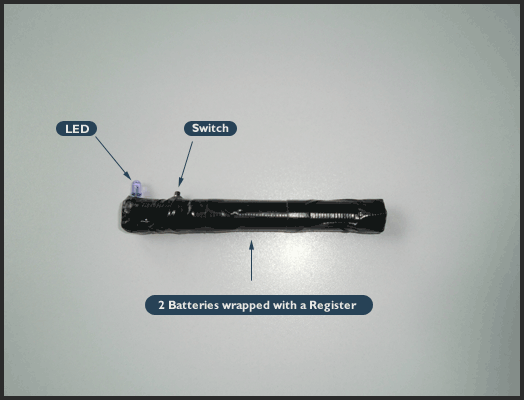


    Lesseons learned:
  • If you do not use a register, it will still work, but the porbability is that your IR LED will burn out after some time.


  • Its better to make a pen with the LED on the back instead of having it on the tip. It is much more efficient for detection by the Infra Red camera on the Wii Remote (especially when the remote is behind facing the screen). In this case, the button can be used as the tip, where one can actually press on with the button on to the screen ( e.g. the wall) to acheive interaction. This also somehow gives it a haptic feedback.


    Using the Multi-point Interactive Whiteboards

    To use the IR Pen for Low-Cost Multi-point Interactive Whiteboards, you will need the following:

  • A beamer
  • A computer with Bluetooth capabilites
  • A Wiimote
  • The IR Pen (2 needed for multi-touch)
  • The Whiteboard Application
  • Multi-Touch Application


  • Setup Directions: First install and activate Blue tooth in your PC/laptop. Not all Bluetooth software can detect the Wiimote and those that can do not often come free. One common one is BlueSoleil which has a trail version with limitations on the amount of data transfered. To download it click here. Once activated, Bluetooth should automatically detect the Wiimote when you turn it on. Next, download and install a copy of the Whiteboard Application from page here.

    Activate your wiimote, start the program and do not forget to connect the beamer with the computer to project your screen. Put the Wiimote in a direction facing the screen(e.g. in 45 degree angle) where the IR pen can send signals smoothly.

    Once you start the Whieboard application, you need to calibrate the screen size before using it. To do so, just click on the red pointers that appear at each four corners of the screen shown at the begining. Good callibration can be difficult and is the key to give you a smooth movement in your projected area.

    Multitouch: The multitouch demos are custom C# DirectX programs. You may download the sample program from Johnny Lee's page, but this is provided for developers without support or documentation. The code is built on top of this Wiimote library. Unfortunately, multi-touch capable applications are currently extremely rare. Hopefully, that will change as more developers explore its potential.


    Making an IR Glove

    Holding a pen is good, but holding nothing is even better! So, we decided to build the IR Pen in a glove which the user can wear. This also meant that having two gloves would allow the user to do multi-touch functions more easily.

    Building a glove raised one prime question: Where to put the source of light ? One way was to have an array of LEDs near the wall or screen directed to the user. The gloves could use a set of refelctors which sends back the signals to the Wii mote placed near the light soruce.

    The second option was to built the LED source directly on the glove but this required a power source that can be carried with it. We opted for this option and fixed everything on a working glove for the right hand.

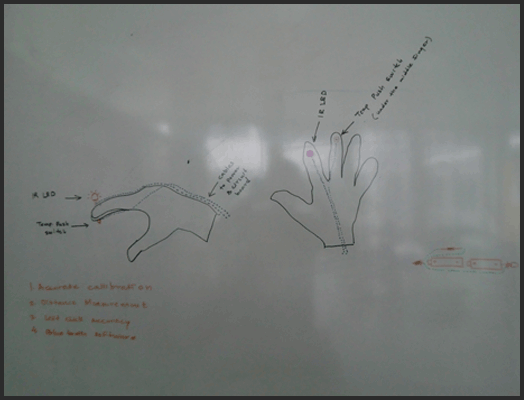
    Here is a very first sketch of our idea :


    The glove controlled the mouse pointer on the projected screen. What was missing was a click to do some actions. To provide this, we took apart a small mini-mouse and hooked it up to another small switich under the middle finger of the glove. The user could press it with the thumb and trigger the left click.


    This basic glove allows moving mouse pointer and clicking options from a fair distance to the screen as long as the mouse is connected to the computer. Our cheap mini-mouse was cabled to the USB drive - meaning that we were some how bounded. To set ourselves free we need to replace it with a wireless-mouse.


    Resources and Other Cool Stuff

  • See Johnny Chung Lee's original Wii Project page here
  • Download BlueSoleil blue tooth software here
  • Download the Whiteboard Application here
  • GlovPie - Control Games with gestures. Download here