Teacher’s Zoom Quick
Start Guide
This guide
is intended for you who suddenly find yourself with the task of conducting
teaching activities online with Zoom and don’t have the time to go through all
the features and documentation to get started. This guide should get you up and
running in 30 minutes and help you avoid some caveats and pitfalls. To become
more proficient, you still need to read the documentation and experiment
yourself, this is just a quick start guide.
It will
also give you advice on how to handle and circumvent some shortcomings and bugs
in Zoom that an official guide would never give you.
You are
assumed to have a Zoom account and maybe, but not necessarily, have
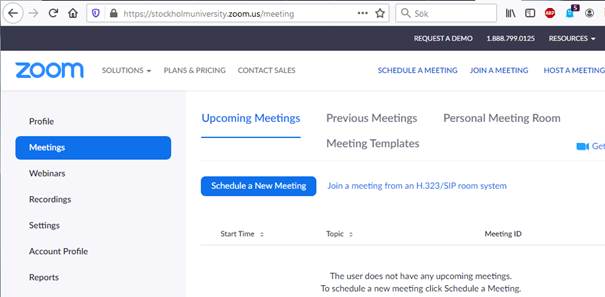
participated in a Zoom meeting. The first thing to notice is that there are two
kinds of online lectures. There is something Zoom calls a webinar, which comes
at extra cost and enables you to run very big events.
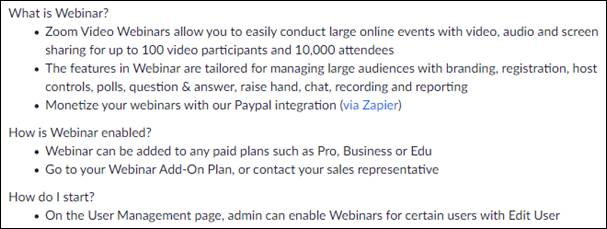
Source: zoom.us webpage
This guide
will instead focus on using the standard Zoom feature “Meeting” to give your
online lectures. It will be divided into five parts: Scheduling a lecture, The
Control Panel, Giving a Lecture, Five Teaching Tips, and an Appendix with the
student’s perspective.
Scheduling a Lecture
First, you
need to schedule a meeting which you do the same way with a lecture as if it
was an ordinary meeting. Open the Zoom application that you are assumed to have
downloaded when you registered your Zoom account. Otherwise, refer to the Zoom
webpages for instructions.
The meeting
scheduling dialog box is fairly self-explaining, but there are a few things to
look out for.
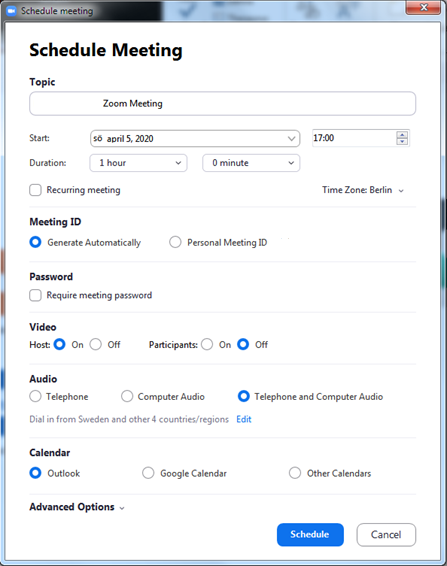
1. For online classes, you will want
to generate IDs automatically, since you might want to reuse the meeting links
or you might want to hand over the hostship to
someone else. In both cases, it’s better to have the meeting not being
associated with you as a person. The duration you specify seems not to
influence anything except the advertisement for the class provided that you
have a license. (If you are running an unlicensed copy of Zoom, the time limit
is very strict and the class will end abruptly at exactly the stop time.) In
addition, if an intruder gets hold of your personal meeting-ID, that intruder
can use it many times in the future.
2. For important classes, such as
examinations or thesis defences, you should require a meeting password.
Otherwise, meeting gate-crashers could enter your virtual classroom and create
some havoc. (If you run without passwords and that happens, you should oust the
intruders by expelling them from the meeting. That might create an unnecessary
interruption, though. You might ask if such gate-crashers exist, and the answer
is a definite yes. There have been some incidents already during the first
weeks of online-only teaching at our university. This is due to the fairly
simple naming scheme Zoom uses in the invitations URLs.)
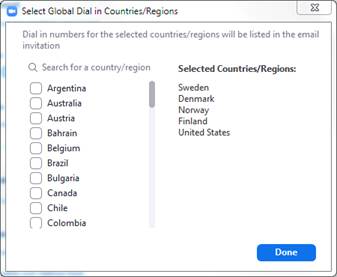
3. If you want students to be able to
call in by phone in addition to connecting by Internet (they might have limited
bandwidth at home or be on the move), make sure you include dial options that
are local to those calling in. You choose Edit in the Audio section.
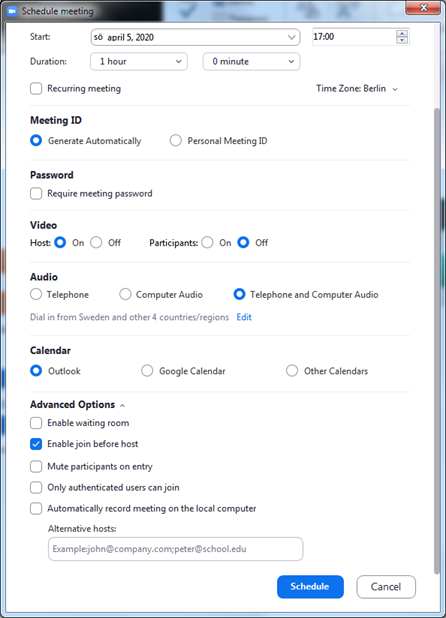
4. Expand the Advanced Options.
There you find some options available for the meeting. Do not select Enable
waiting room since, as nice a feature as it is, it is also known to
interfere with the Breakout Room feature you want to use in your lecture. There
should not be a problem using both, but experience has taught us to keep away
from the waiting room. It lets newly connected students stay connected without
being let into the lecture room before the lecture starts. It corresponds to
not letting the students into the classroom before the lecture begins. If you
intend not to use breakout rooms (group rooms), then by all means use this
feature if you like.
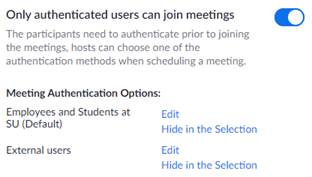
Also,
consider the option Only authenticated users can join. Read about the pros
and cons in the section on Giving a Lecture below.
5a. Pay attention to which calendar
option you select. If you select Outlook but is not a regular Outlook
user (for example using Thunderbird or Google calendar), Zoom will try to
launch Outlook and, if you have it installed, will hang in the following alert
box.
You should
then look for the dialogue box below that will appear on your screen. If you
don’t want to use Outlook, you should click on Deny.
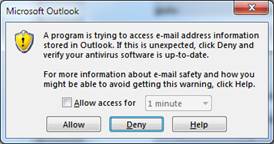
If you click
Deny, however, the message above keeps reoccurring until you manage to
close down Outlook completely. Thus, if you don’t use Outlook and don’t want to
get caught in trouble, avoid the Outlook option. But beware: if you do not have
an Outlook installation, your entire lecture scheduling is lost and you have to
begin all over!
5b. If you instead choose Google
Calendar, your default browser will be opened and you will be asked to log
in to your Google account. When you are logged in, you will be redirected to a
web.zoom.us URL. But beware: if you do not have a Google account, your entire
lecture scheduling is lost and you have to begin all over!
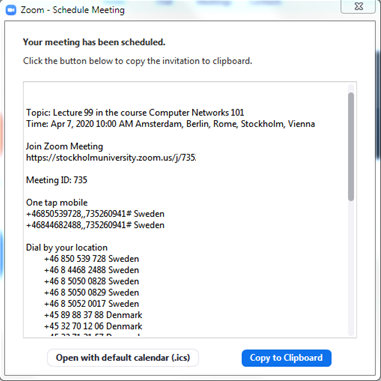
5c. If you do not use Outlook or
Google Calendar, make sure you choose Other Calendars. This way, there
will be a standard message generated for you in a text window that you can copy
and handle as you please. This could be the preferred option even if you use
Outlook or Google since it gives you the freedom to announce your lecture in
any way you want.
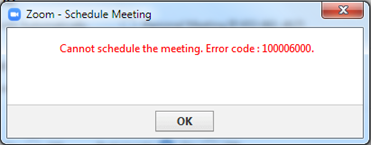
It is not
uncommon for the scheduling to fail. When this occurs, you will be notified by
an error message that is incomprehensible. Even searching the error code on the
internet or on Zoom’s help pages come up empty. The only thing to do is to
restart the client program altogheter, it seems to contain
very little when it comes to error handling or recovery.
Confusingly,
you can also schedule a meeting from your account page on the web. More about
that webpage later, this is just to notify you of the dual manoeuvring modes
that come with Zoom: the application and the webpages. The webpages can be
reached by logging in to the URL youruniversity.zoom.us, in our case
stockholmuniversity.zoom.us, with the usual single sign-on method.
One
important example of what you can set in the webpage settings is whether only
authenticated users can join your class. The setting you want depends on
whether your students come from outside or not and, if only from inside the
university, whether they log in using their student accounts rather than their
private accounts. While this security feature is tempting to activate, it might
exclude legitimate students from participating in class. A suggestion is to
warn them beforehand if this feature is being used. Note: this setting
can also be set in the scheduling dialogue, see the section Scheduling a
Lecture above.
There are in
total 55 settings in one long list, some of them being the same as the settings
in the application tool. Most settings can be left as they are until you become
an expert in Zoom.
The Control Panel
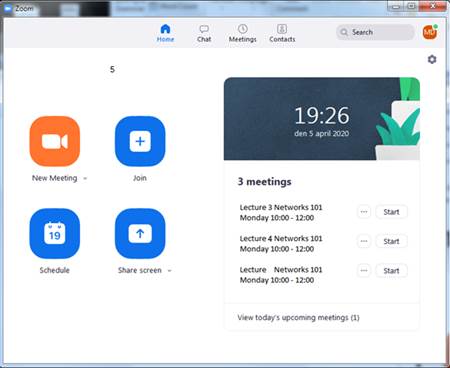
Moving back
to the application, you can now see your lecture(s) scheduled on the right-hand
side. From this control panel, you can start each lecture at any time you want,
irrespective of which start time(s) you entered when scheduling the lecture(s).
There are
many settings in the control panel, some of which are important when lecturing.
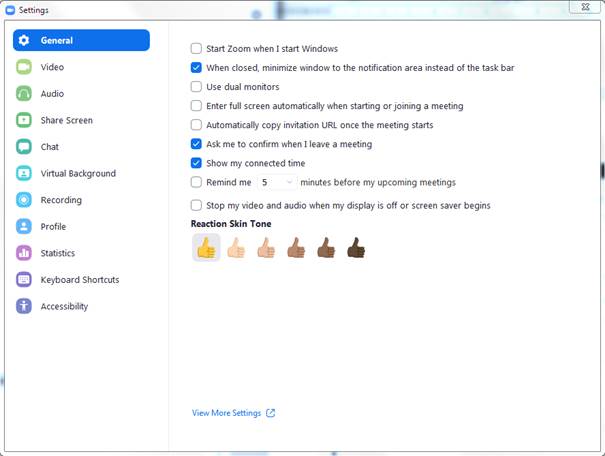
1. In the general tab, make sure to uncheck
Enter full screen automatically... Otherwise, this feature will make you
lose control over all other programs and learning tools you want to keep open
during the lecture.
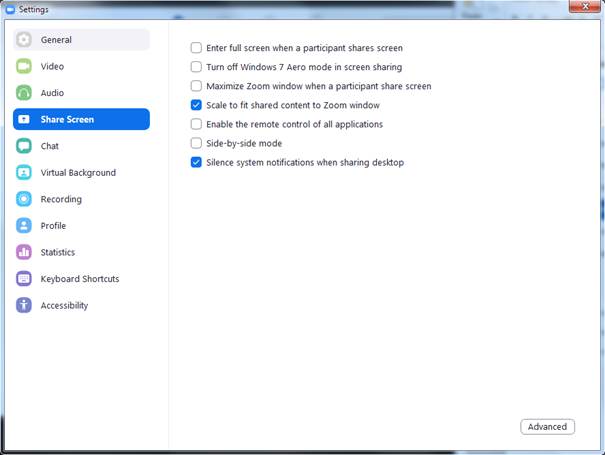
2. In the Share Screen tab, make sure
you uncheck Turn off Windows 7 Aero… Otherwise, this feature will
suddenly and unexpectedly change the entire look of your desktop and all its
windows if you are running Windows 7. For example, when you share a Powerpoint presentation, Zoom will guess that this is too
much for your computer and at an instant change the looks of your desktop
completely. Very confusing the first time, and better avoid it entirely.
Some of
these Zoom windows are obnoxious and refuse to move into the background together
with the Zoom application itself. One of them is the settings window above.
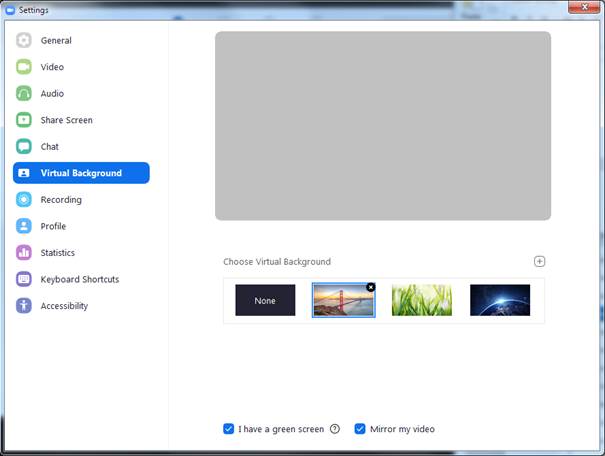
3. A popular option is to have a
virtual background for your camera instead of showing the room you are actually
in. This works so-so on some backgrounds, you have to do a bit of
experimenting. Your face is most often preserved, but you can lose an arm or two
in the video sent. Your choice.
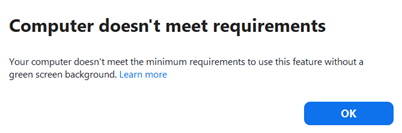
In many
cases, though, even with fairly new computers running Windows 10, Zoom decides
that your processing power and camera abilities are not enough for you to enjoy
a virtual background. Sometimes this can be fixed by downloading the newest
Zoom client, sometimes not.
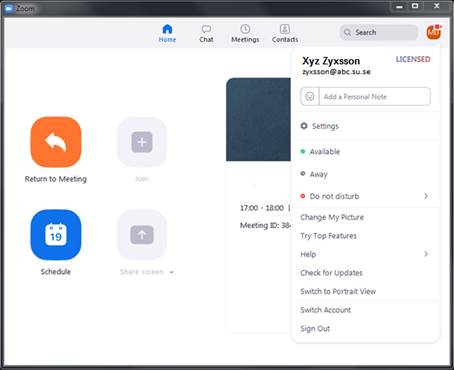
4. Under Profile, you think
that you can edit your profile. While this is true to a certain extent, many
attributes are locked by the subscribing entity (most often your employer) if
you are using a licensed account. When you sign in, you are taken to the
webpages that reside outside of the Zoom application.
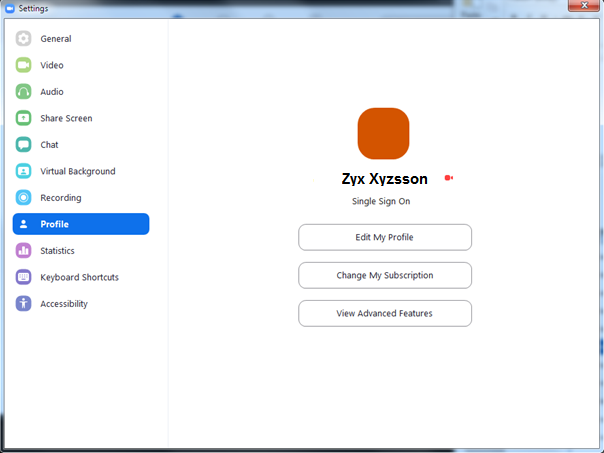
So again, we
arrive at the dual interface to Zoom: the application and the webpages. On your
webpages, you can make further settings that are not available in the dedicated
application. Fortunately, most of the webpage settings can be left unaltered
for lecturing.

Giving a Lecture
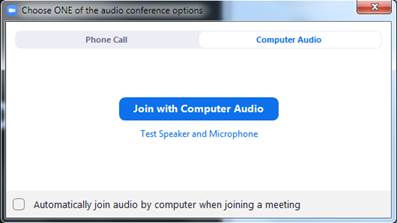
By clicking
Start on your control panel, you are taken to your Zoom lecture. The
first dialogue box you encounter is the audio options box. Make a habit of
always testing the speaker and microphone before each class. Those few seconds
are well spent since Zoom loses track of previous settings from time to time.
Also, for the same reason, never tick the Automatically join… option. Things
might get awfully quiet for a while.
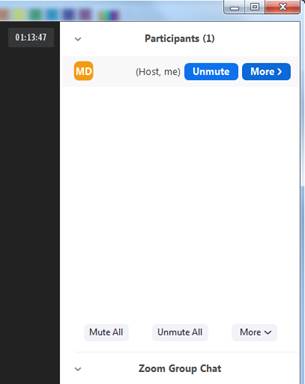
Since you as
the teacher arranged the lecture, you are the host and are given host
privileges. If you click Manage Participants, you enable the right side
of the screen and can see yourself in the topmost right corner listed as (Host,
me). At the bottom of the window, there are a number of function buttons. Some
of them are fairly self-explanatory, some not so much.
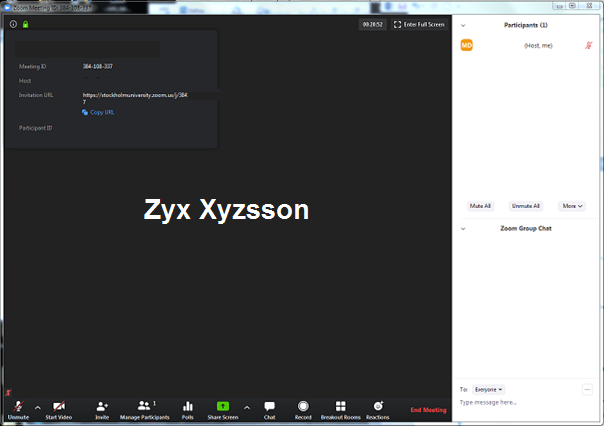
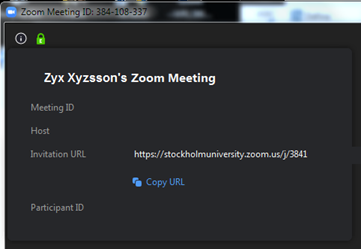
In the
upper left corner, there is an information symbol that gives you access to the
URL if you want to invite more people to the lecture or if a student has lost
the URL.
In the
upper right corner of the black part of the window, you can (if you enabled the
function) see how long time your lecture has been running (and thus if it is
time to take a break). Just remember that it is the time from you connecting to
the virtual lecture room, not the actual duration of the lecture.
![]()
The right
part of the screen (Manage Participants) also contains some control functions.
You can mute or unmute all students. Further, you can control whether students
can unmute themselves or not as well as rename themselves (some might have
peculiar login names).

The control
list at the bottom of the black area contains 10 symbols and an End Meeting
button. This is different from the control list you see as a student.
![]()
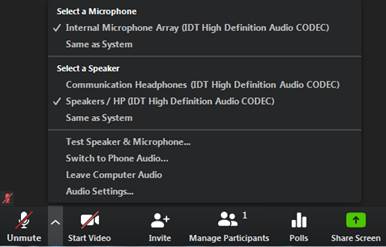
To begin
with the left six, Unmute is not at all only unmute but contains a lot
of audio controls. As stated above, you should make a habit of checking your
audio every time you enter a virtual classroom since Zoom sometimes has a
difficulty in assigning the correct devices to the classroom. If you feel
something is wrong or you just want to check when you are already in the
classroom, click on Unmute and a pop-up menu will guide you.
![]()
In this
menu, you can choose which microphone (if you have more than one, say one
built-in and one in a headset) and which speaker (again possibly one built-in
and one in a headset – you might even have both a cordless Bluetooth headset
and a wired headphone for example) to use. Zoom tends to forget these choices
and settings and are sometimes even having trouble recognising attached
devices. Here is also where you can do the same test as you were offered prior
to entering the virtual lecture room.
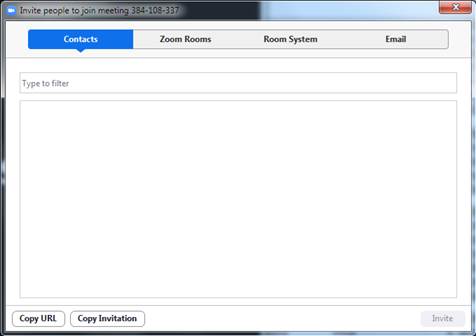
The Invite
function is straightforward and lets you invite additional participants during
a lecture in four different ways.
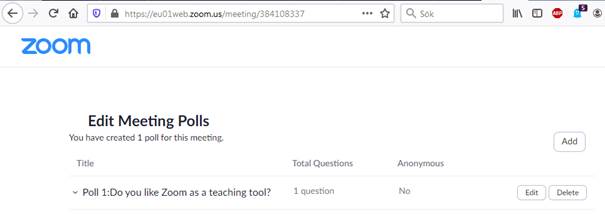
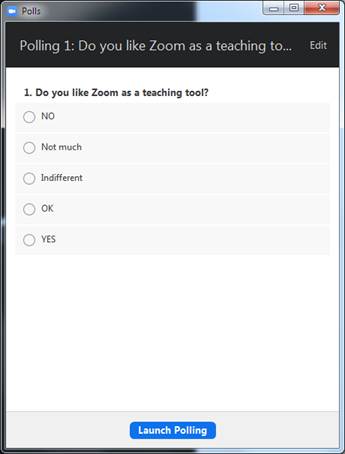
The Poll
function is rather straightforward, but again contains this confusing mix of
some functionality residing in the application itself and other, like creating
the poll, residing instead on the webpages.
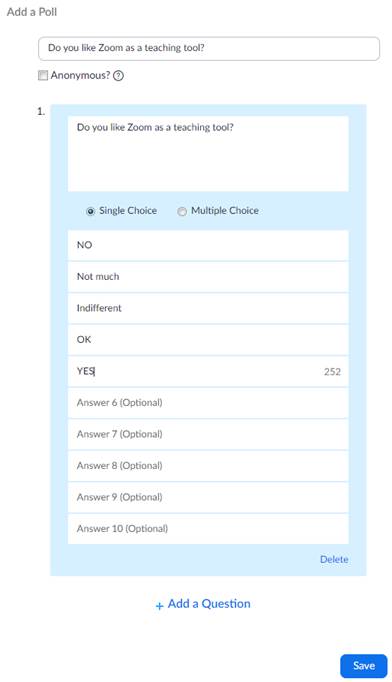
You edit
the polls on the webpage but manage the poll itself in the application tool.
When you
launch the poll, the rest of the steps are intuitive and in the application
tool itself. Except edit takes you back to the zoom webpage where you created
the poll in the first place.
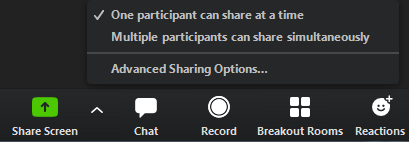
Share Screen is an important feature that lets
you show your teaching material on all participants’ screens. There are a
number of important settings you must consider. First, select that only one
participant can share at a time, otherwise it can become messy and confusing
when several students want to show something at the same time.
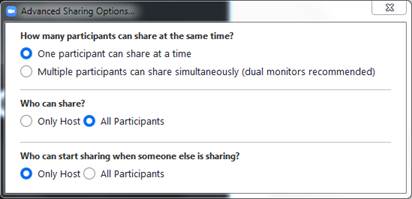
You must
also consider the advanced settings (the previous option repeats here for some
reason). You must decide whether only you as the teacher is allowed to show
material on everybody’s screens or if students are also allowed to do that.
None is better than the other, they are simply different and permit different
dynamics in the virtual classroom. If you allow all students to show material,
you should combine that with selecting that only you, the teacher, can override
the currently showing screen. This way, you will not lose control over the
lecture.
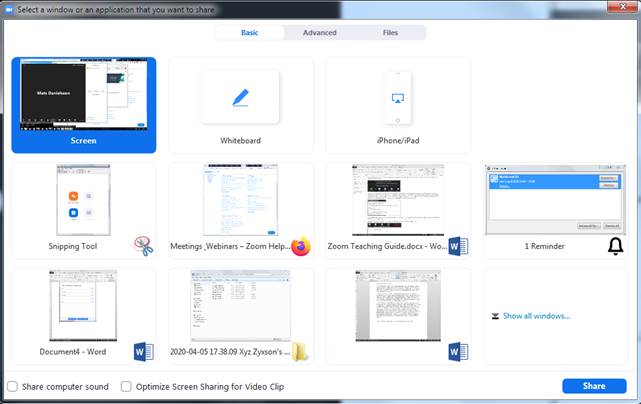
Screen
sharing, unfortunately, has more caveats. When you try to share your screen,
both as a teacher and a student, you are given the option of sharing your
entire screen or a specific window. But on some computer installations, whether
you select Screen or a specific window, the entire screen is shared! Thus,
windows you might not want to expose will inevitably be exposed. This is a
major flaw. Check in advance if your computer is affected.
Another
problem with some Windows installations is when you try to share a Powerpoint presentation. Some of the installations almost
crash, Powerpoint cannot be launched at all until
Zoom is closed entirely. Thus, if you intend to share Powerpoint
presentations during your lecture, make sure to test them well in advance. If
you run into problems, the (not so good) solution is to print the presentation
to a pdf file before class. Pdf files tend not to crash during Zoom sessions,
but you lose the dynamic of your presentation if you have animations, transitions,
video, etc. Make sure you test this well in advance of giving your lecture,
even if you do not run Windows. Other Microsoft Office products (notably Word
and Excel) seem to be affected by similar problems from time to time. In
general, test the compatibility between Zoom and any other tools you intend to
use prior to the lecture.
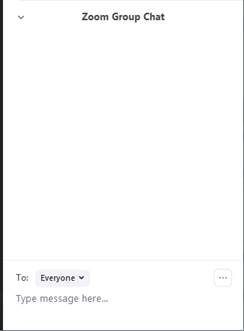
Moving on
to the second half of the tools list, there is a Chat. At first sight,
it seems like a normal chat that can be useful in teaching but it has a serious
flaw you must be aware of. It has no memory even within a teaching
session. This means that students that enter the session after you have written
messages (say links or instructions for the lecture) are unable to see them.
Further, there is no way for them to know they are missing messages and no way
for you as the teacher to know which students are missing which messages. Not
even indirectly, since there is no way of seeing at what time a particular
student entered the session. So the chat is useful only if you know all
students are there when the messages are sent. So don’t make the mistake of
planning ahead by publishing instructions for the lecture in the chat prior to
the session. Nobody will see them and they will not know that they are missing
anything.
However,
for instant communication at a particular moment during a session it can still
be used, see Five Teaching Tips at the end of the guide. One more caveat is
that the chat may suddenly stop for some students while it keeps running for
others including yourself. You have no way of knowing this either. When you
have sent instant communication messages, ask to make sure everyone still has a
working chat. Unfortunately, the seemingly only way for a student to remedy a
frozen chat is to restart the Zoom client. Exiting and reentering
the lecture (meeting) seems not to work. And let’s just hope and pray that it’s
not your chat as a teacher that stops since when you exit to restart the entire
session stops unless you assign hostship to one of
the students in the meantime.

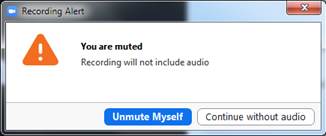
The Record
option is rather self-explanatory. It even contains a warning if you as the
teacher happened to be muted at the time you started the recording. But as
usual, there is a caveat. By default, the settings allow both teachers and
students to record the lecture. That might give rise to intellectual property
and copyright problems since the button on the students’ screens can be seen as
consent to record the lecture. A recording that may subsequently be distributed
on various channels.
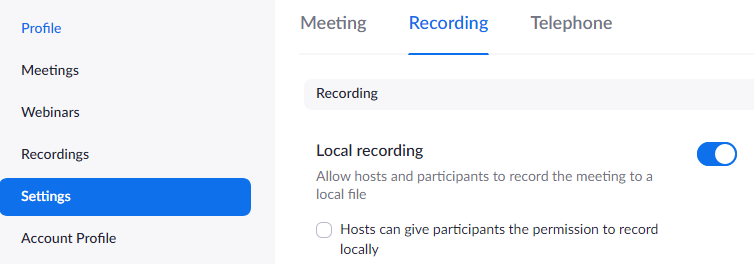
In the
webpage settings (not the Zoom application settings), there is an option not to
let the students record the lecture. Make a deliberate choice whether you want
students to record your lecture or if you want to record and be able to edit
the recording before releasing it to the students, thus keeping the recording
under control.
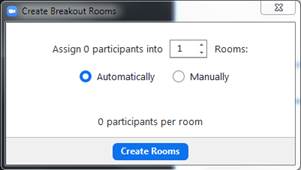
The Breakout
Room is an important feature that allows you to divide the class into
groups. Unfortunately, this is not the most well-developed
function in the toolbox. You can divide the students into groups either by
random or deliberately. If you already have long-running groups or if you have other
pre-defined groups, select Manually and then divide them into groups as
they arrive. If you, on the other hand, either don’t have groups or have groups
but want the students to be in different constellations for this particular
lecture, select Automatically and Zoom will divide them up for you. Unfortunately,
Zoom does not remember the divisions made. If you at the beginning of the class
use pre-defined groups, then want new mixed groups, and finally want to go back
to the pre-defined groups, they are lost and you must manually assign them
again. Also, a division into groups cannot be stored between sessions. This is
one missing feature that shows that Zoom was not intended (or even suitable)
for teaching in the first place. This problem is one thing if you have 30
students in class and quite another if you have 300. In the latter case, and
probably in any case significantly above 30 students, you need an assistant to
handle Zoom while you lecture. This technical teaching assistant, who does not
need to share location with you, will then be given the host privileges and run
the Zoom application for you.
There is a
role of co-host that is given some of the privileges that the host has, but not
the one that you as a teacher would like the assistant to help you with the
most – managing breakout (group) rooms. The co-host can instead do other, less
important, host tasks like polls. You assign a co-host by clicking on that
person in the participant list.
Another
problem with teaching with breakout rooms is that they are in essence
mini-meetings and not teaching groups. When you send your students into the
groups, there seems to be no way for them to keep sharing your screen which in
many cases would contain a description of the task they were assigned for the
breakout session. You must cater for their access to assignments or other
important information in other ways (for example, the chat is preserved).
A
surprising non-feature of breakout rooms is that you as the host can assign
each student to a room, and also reassign to another room if you made an error.
But it is impossible to unassign a student when you
want one or more students to remain in the main room together with the
teacher(s), for example for extra instruction or for special preparations.
Furthermore,
sometimes (especially but not only when you assign a student to a new room
different from the previous) the Zoom application forgets to show the pop-up invitation
window where the student should click OK to accept entering the room. There
will in those cases simply be no sign of any room assignment. If this occurs,
ask the student to manually look under the breakout room symbol at the bottom
of the window by clicking on it. There, the invitation to join the room is then
to be found when Zoom fails to show it in the proper way.
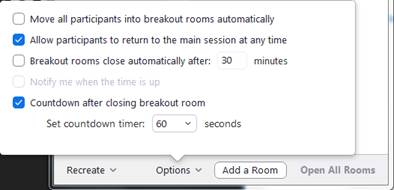
There are a
few settings for the breakout rooms. They are rather self-explanatory but you
should think in advance, when planning the lecture, which flow you want in the
group sessions. Predefined duration or you call the closing manually (by
peeking into some group rooms and see if they are done)? Keeping them in the
group rooms until the time is up or letting them return when finished? Combine
return when finished with you calling the closing of the session when all or
almost all have returned? There are no rights or wrongs here, just make sure
you plan your teaching ahead of giving it.
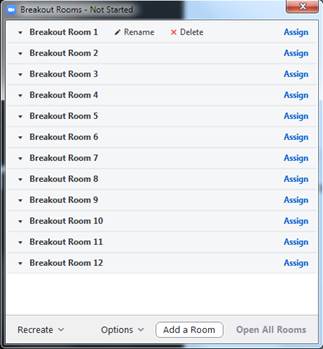
If
assigning groups manually, you will be notified when all students have been
assigned to a group.

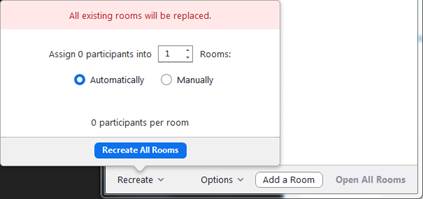
If you want
to replace your pre-defined groups with random ones, this is very easy. Just
remember that you cannot get your old groups back without recreating them from
scratch.
Up to
around 14-15 groups, you can keep track of all of them at the same time. More
than that and you will need to scroll.
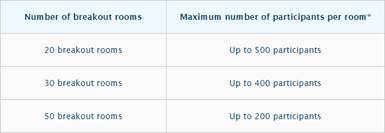
There is
practically no limit to the number of groups you can have in class. From the
Zoom documentation, there are theoretical limits but few of us will reach them
since although some classes have several hundred students, few teachers will be
likely to attempt to assign them to groups in real-time. And unfortunately, it
cannot be done in advance.
Reactions are self-explanatory.

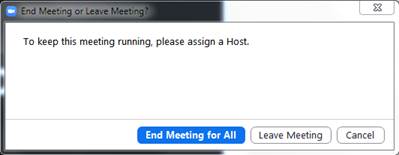
Only the
teacher (host) can end the class, the students have in the same place a button
to leave the class. When you as the teacher leaves, you are prompted with a
question whether you want to end the class or assign another teacher to the
class. This is to prevent disconnecting the class if there is more than one
teacher and you leave while another one stays.
There are
other useful tools, such as drawing tools and music, but it would be too
extensive to cover them in a quick start guide. You should definitely explore
them, and they can all be found on the zoom.us webpages. But once again, beware
of stability. Don’t assume, for example, that every student hears the music
played just because most do.
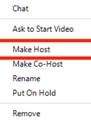
In order to
change main teachers (hosts), go to the upper right corner of the window. Since
you are the host, there is a host marker next to your name. Click More
at the person you want to become the next teacher (host) and select Make
Host. [The example only contains the teacher in the picture so it is not
representative.] This is also the function where you can oust unwanted
participants from class.
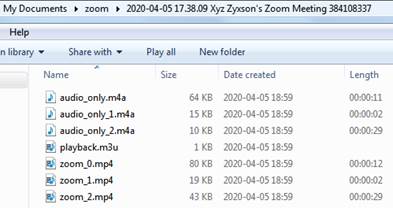
If you made
any recordings during the lecture, they can (on a PC) be found in a folder
created by Zoom in the My Documents folder.

Each
recording has its own file that you can edit using standard audio editing tools.
There can also be video recording here if you made any during the class session.
Five Teaching Tips
1. The chat can be really handy when
teaching if you think in advance how you would like to use it – or it can be
rather hopeless. If you ask students to write questions whenever they have one,
you might wind up looking at the chat constantly during the lecture. That
detracts from your focus as well as from your appearance on screen. A better
way is to use it on designated occasions when you ask for opinions, questions,
or feedback. When asking for input, one advice is to tell the students to write
what they want to say but refrain from immediately submitting it. Incoming chat
messages tend to detract from writing your own message. Then, after given
enough time to write, you ask the students to submit all at the same time. Then
you read through the messages, acknowledging them and replying as you see fit.
2. Explore the drawing and annotation
tools. They add to the dynamics of a lecture, and several participants can draw
at the same time. Not the prettiest drawings, but there needs to be some fun
inserted into distance teaching to compensate for the lack of physical
presence.
3. If you have some students that are
reluctant to keep their cameras on because they feel exposed, especially in the
standard meeting mode where the speaker is shown in the main centre frame,
there is a remedy. If you have 48 students or less, whenever you are not
presenting teaching material by sharing the screen, you can ask everyone to use
gallery mode in which each person is shown in a very small frame which is less
intimidating. The gallery mode cannot be mandated, however, and fellow students
can “cheat” by using the standard view instead. There is, however, a way to
prevent this. If you, when not showing teaching material, instead make a habit
of always screen-sharing an all-black image, a university logo, or any other
neutral image, you will force everyone’s screens only to show miniature videos
of participants. Assuring this ahead of class tends to help more introvert
students to participate with video since it is perceived as much less
intruding. And as a last resort, ask the students that don’t have or don’t want
to use video at all to at least upload a picture of themselves in their profile
so that the others don’t have to see the very impersonal name-on-black default
(like Zyx Xyzsson* above).
4. During the breaks, invite the
students to hang out in the virtual classroom and small talk. This compensates
a bit for the lack of coffee room presence that usually adds to the university
experience. If there are more than one teacher and you need to discuss
something during the break, send yourselves to a breakout room and leave the
students in the main room.
5. Since there is no way of sharing
documents, and no way of bringing the main room’s screen into breakout rooms,
make sure in advance of the lecture that everyone knows how to frame and
capture the screen, a window, or how to snip an arbitrary part of the screen.
This way, they can still bring a task description or other lecture notes with
them into the group sessions.
Appendix
From the
student’s perspective, a Zoom lecture looks almost the same but with some
notable exceptions. The command list has fewer options. In particular, Manage
Participants is replaced by Participants, and Polls and Breakout
Rooms are missing altogether. End meeting is replaced by Leave
Meeting.
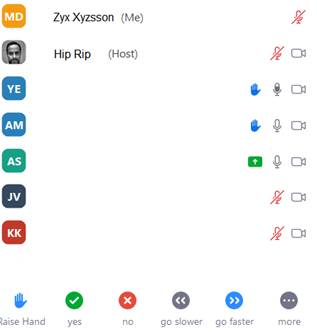
![]()
The right
panel has some interaction functions. The students can ask for permission to
talk by raising their hands. While this function is good to have, it soon
becomes somewhat unmanageable when there is a large number of students present.
Around 15 students can be shown in the panel without scrolling, and even though
those raising their hands are moved to the top of the list, a larger number of
raised hands still will require extensive scrolling.
This is how
it looks from a teacher's perspective when a couple of hands are raised. You
can also see which student is presenting if it is not you by the green screen
symbol next to the microphone.
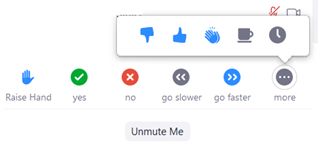
Further,
the students can interact with a set of rather self-explanatory symbols. These
symbols show up in the right-hand participant list of the teacher and of the
fellow students. If these symbols are used together with raising hands, and the
number of students exceeds 15, you will be scrolling a lot. Apart from symbol
signalling, anyone talking will also float up to the top of the list where only
you and the host (if separate) are permanently affixed.
Good luck with your Zoom teaching!
/MD 2020-04-07
version 1.1
This guide refers to Zoom version 4.6.10. Subsequent
versions will inevitably have new, enhanced, and corrected functionality. The
guide will not be updated since it was a Corona emergency advice compilation
for Zoom newbies.

* Anyone wondering how Zyx Xyzsson is pronounced? It’s
pronounced “Sick Season”, referring to the Corona pandemic season 2020.