Role
in project: Concept Artist, Level Designer, 3D modeller/Animator/Texturer

Click to enter the Mimic Gallery
The final course of the program in gamedesign at DSV was to create a playable
game.
The genre, style programming language and engine was left entirely up
to us. But there were a number of criteria that we had too meet.
-
The concept had to be presented and approved before production began. -
A vertical slice had to be presented to the whole class. -
A Game Design Document (GDD) had to be written and updated. -
The project had to have a page containing relevant information. -
An online diary was written for the duration of the project. -
A playable level of the game was to be delivered to the teachers and the rest of the class.
Design and genre
The style and mood was left almost entirely up to me. I began very early
on with concept arts and level design. I wanted to find a style suitable
for kids with a blend of cartoon and 3D-renderings.
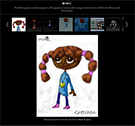
The Avatar
 The
first iterations of the hero was more imaginary creatures since this was
a dream it could be anything.
The
first iterations of the hero was more imaginary creatures since this was
a dream it could be anything.
I drew inspiration from Sonic, Mario, Pokemon and similar figures.
None of them felt quite right, even though I was quite happy with the
small wizard.
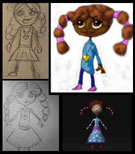 As
time went however, the hero became a small girl with braids.
As
time went however, the hero became a small girl with braids.
This tied better in to the kind of story we wanted of a child being drawn
into a dreamworld.
I made the basemodel in Maya and exported it to ZBrush. I made many iterations of the model with and without yes, and in the end focused on making a big head and big braids, accentuating further that it´s a kid and not a grown woman.
For the longest time I tried to have her wear a skirt or a dress, as I did in my original concepts. But It never worked out well and gave me more problems then it was worth.
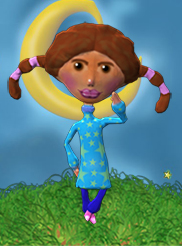 After loosing the skirt and reworking the mesh, it became much easier and fun to create her.
The texturing was made with polypainting in ZBrush and then cleaned up and the details sharpened in Photoshop.
I´m really happy with how she turned out, but since I did not need to concern myself with polycount-budget, there are more polygons then are needed for a game model.
If I was to use her again for a 3D-game, I would retopologise her first to create a new cleaner mesh with fewer polygons. Then I would apply a normal map and a bump-map to add the detail..
A different toy story
The design is centered around toys. The idea is that the world is inhabited
by the toys belonging to the hero, Gretchen.
In the dream there are both good and bad, and to escape she must take
on the shape and abilitys of the nice toys to evade and defeat the bad
ones.
For example, the first level requires the player to swim under water. It made sense to have a plastic frog, fish and seahorse in there as Mimics.
The enemies had to be toys a girl would own as well as fit into the theme.
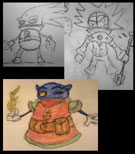
Designing the toys
At first we felt a squid or jellyfish would fit well, but that didn´t work at all. I mean, how many kids own a jellyfish toy? At least it can´t be that common.
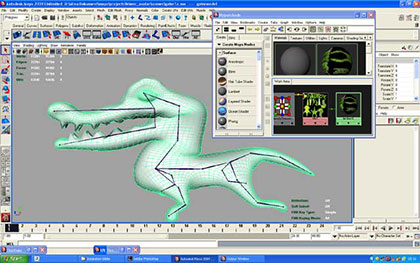
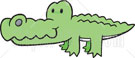 Next was the crocodile wich felt perfectly natural.
I looked at many toys for references because I did not want to make something that ended up looking to real.
 Instead I thought of how they reacted to the light and the material, mainly plastic of course, and how they would possibly look if bought.
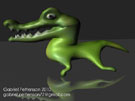
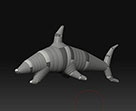
The shark was intended as something much larger and more dangerous. In the end we included 2 sharks and the trick is to avoid them as fast as you can.
 I designed the shark to be more menacing and textured it with a Tigershark in mind. This is after all a toy not usually made cute, even when it´s aimed at kids.
The mimcs, wich allows the player to change into different shapes, would be logical and nice-looking.
Since the first World was Jungle and the levels would be based around different toys fitting that setting, the mimics needed to fit in too.
 The Fish and frog evolved quite naturally. I sketched a little to get the feel of things, but mainly I looked at toys for inspiration.
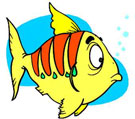
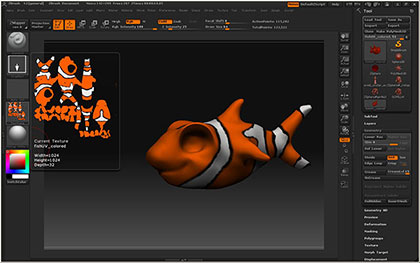
The fish I based loosely upon this image, and after the reaching a model I was happy with, I started to look for textures.
![]() I wanted something brighter, and remebered Finding Nemo. The Clownfish was just what I had been looking for.
I wanted something brighter, and remebered Finding Nemo. The Clownfish was just what I had been looking for.
I polypainted it in ZBrush after a reference and cleaned it up a bit i Photoshop.
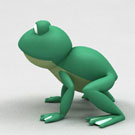 The frog is based on this image of a digital frog, but it lookes very toy-like to me.
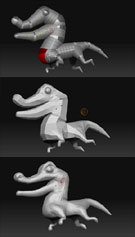
I did several designs I rejected before producing a prototype I liked.
However it was flawed and that forced me to alter it a bit in order to animate it properly.
By the use of retopologizing and further modelling ended up with a much better model, and it worked well in Maya after export.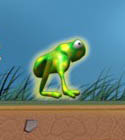
I had not yet realized the problems associated with ZSketching, so this was a good learning experience.
The finished frog lookes like this after retopologising and rigging.
The plan was to end every World with a boss of some kind. I envisioned at least 3 worlds, the Jungle, the Castle and the Haunted Mansion.
Because of problems with the coding we ended up with only one Jungle level and the following bosslevel.
This was allright though, since everyone got to see the vision in that first level.
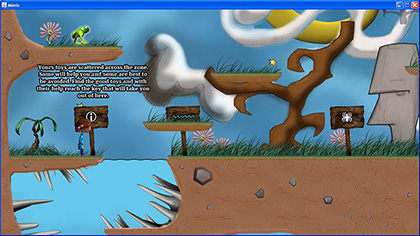
World building
Going into the project I began thinking of how the first levels should work. I didn´t want the gameplay to be just another platform cone of Mario, rather more of a adventure and puzzlegame.
This would include becoming a baloon in order to float to high altitudes, a ball to become bouncy, a unicorn to run and jump over obstacles and the like. The problems would tie into what Mimics would be present and the idea was that the challenge would be how to best use them to get to the Level Exit.
 a>I sketched out some ideas and we discussed solutions in the team. I produced a 3D model and continued to make a template and mockup of the first level.
The idea I had was to render the model tilted so to give the illusion of depth.
I liked it as a concept, but in 2D it felt awkward, and because I worked on the visual style alone, I had to kill some darlings here, and in the end a flat groundlevel worked best for us in the timeframe we had to work with.
After all, the code needed to correspond to my background graphics, collionsmasks etc.
Visual style of the game
I thought long and hard about the visual style. Looking at other games and photos of real jungles, nothing really appealed to me.
Being a long time fan of Tim Schafers visual style best seen in Monkey Island, Day of the Tentacle and of course the superb Psychonauts, I began sketching clouds and a tree and wanted something not all-the-way 3D.
I tok a photo of my sketch and showed it to the others in the team for evaluation. They gave me a green light, and I preceeded to alter and edit it. I then began testing size, color and compsition in Photoshop, adding more and more layers as I worked.
I tested the ingame resolution by coloring a rectangle of the correct rez over the map, and placed the player-model inside it.
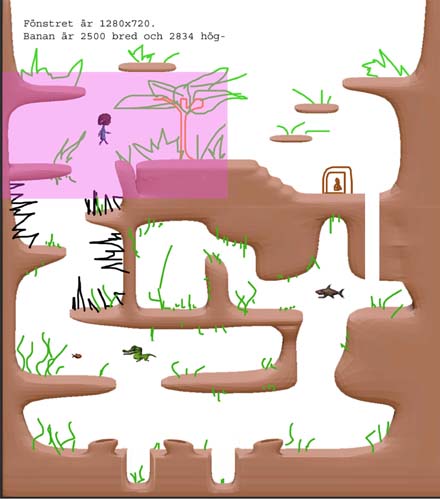
This was something we debated over because at first I wanted as much detail as possible to be seen. So I wanted the "camera" closer to the player.
However, since this was a game played in a window and not full-screen, it became impractical. And the player needed to have a heads-up when the enemies came smimming.
I then reduced the entire level in size and reworked the layout. This worked much better in-game.
Blending the Layers
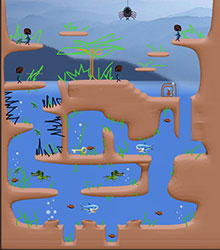
I kept refining the visuals, adding 3D-plants and a Moon model, as well as animated bubbles, and made a earth and rock layer to make the level more organic.
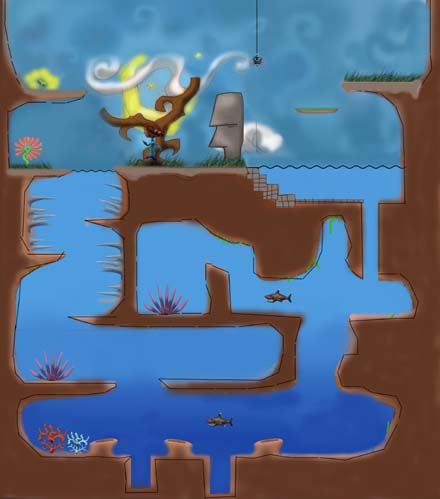
The sky was made by combining my cloud-sketched with stars created from ZBrush and then colored in Photoshop. I really like the feeling that it is a bit unfinished, like a childs drawing.
The workflow was to play around with shapes and tools in ZBrush and export a picture into Photoshop. From there I added color, and resized or altered as I needed to. The finished layer was then placed as needed making up the whole.
Since this was the first time I ever created a complete visual set for a game it was a bit nerv-wrecking, but I learned so much from the process!
Here are the finished two levels.
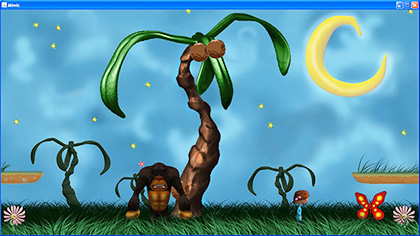
The mighty kong
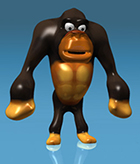
The boss needed to be something big, and again something a kid would have in her bedroom. After some thinking I thought of a stuffed animal, a soft and cozy Gorilla. This seemed perfectly logical.
I struggled some with it. I looked at alot of references to real gorillas and compared them to toys and Donkey Kong. I tried to emulate a real gorilla as far as I could, but in the end it became more of my own interpretation of how a toy gorilla would look.
Most of all I kept in mind this had to work in a game. Especially when it came to texture and color, since a real gorilla is black and that really did not look good against the night sky.
But I made it work with some alterations.
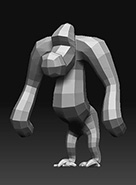 I used a real gorilla as reference as far as I could go. However, I first designed him to walk on all fours, that´s how real gorillas move around most of the time. But in a game it worked much better as a Biped.
After that I retopologized it in order to reduce the polycount and then exported him out to animate in Maya.
 The texturing was done in ZBrush using Polypaint and some minor alterations in Photoshop.
My only regret about him is really the animations. Time was really running out at this stage and I made the last of the animations for the gorilla in the last week of the project.
So there was little room for tweaking or additions after that.
That´s the price you pay as a team to have only one Graphic artist I guess.
I´m still fairly happy with the overall result.
What about the third dimension?
Therefore I built the sketch of the first level in Maya and created real
3D models of the objects.
All models were rigged, textured and animated before finally rendered and edited or composited in Photoshop.
This way I had all the freedom of animation, changing textures and lighting
inside of Maya instead of painting it by hand.
And if we were to change our minds and go 3D, the models would be there.
 As all know who have taken this journey, it´s confusing and strange at
first. Nothing is familiar from Maya or 3DS MAX. However I persisted and
slowly began to understand the wonders of relatime-modelling with digital
clay.
As all know who have taken this journey, it´s confusing and strange at
first. Nothing is familiar from Maya or 3DS MAX. However I persisted and
slowly began to understand the wonders of relatime-modelling with digital
clay.
After that it´s only a matter of how far you want to push your self artistically and what polygon-budget you have.
Since Maya and 3DS can´t handle the millions of polygons that ZBrush throws around with ease, ordinarily the workflow would have included a Normal Map. But I realized no one would see the details because of the size of the sprites!
I love working with the program as it gives me such freedom and saves massive amounts of time.
 Basic workflow is: Create a mesh by ZSketching or by manipulating a Sphere or a Cube.
You have the option of importing a basemesh from another program of course, but I tried to stay within ZB as mush as possible.
Second the mesh is detaled, and Subdivided untill enough details are present. If the model will be animated retopology might be needed.
Again, this can be done inside another program by exporting the model first as an .OBJ. But the retopo tool in ZBrush is very flexible and fun to use so I stayed put for this part too.
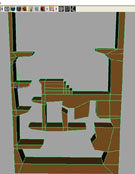
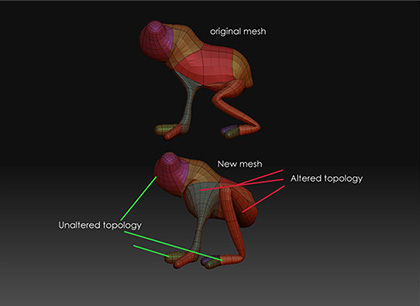
Retopologising the Frog
The need arose for me to learn this tool as I was making models based on ZSpeher-sketching > Adaptive Skin. When the Speheres are not aligned properly, the faces have a way of digging into each other.
Now, this may not be a big concern if you are making a 2D image and the end result is a matter of fine detail.
But if you want to animate it and assign a good UV-map and Texture to it, then edgeflow and topology is Essential.
My frog looked great as a concept, but turned out to be a nightmare to animate, bacause of the hidden faces.
I then hid the parts that was medded up, and bridged the gap with Retopology.
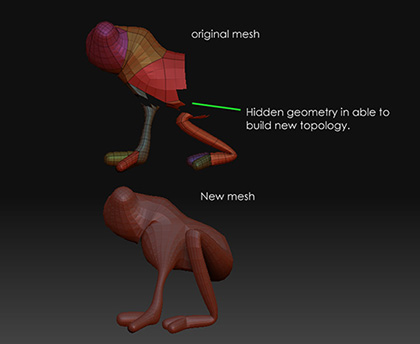
It can take a while, but there is no getting around it if you want smooth animation. It allso helps to get good UV:layout for texturing if the mesh looks good.
You can see here the before and after work of the frog.
Texturing in ZBrush
Texturing can be done after UV:s have been assigned to teh model. ZBrush then has two exelent methods of doing this.
The first is to paint directly on the mesh by using Polypaint, wich I used for every model. It´s great for getting the color and patterns on quickly. But the model needs to be in a high subdivision in order to get sharp details.
A better way would be to use ZApplink to take a snapshot of apart of the model, send it to a Imageediting-program like Photoshop or Gimp, and then add high-rez details. When the texture is reimported in ZBrush the details are transferred to the texturemap. Brilliant!
UV:s can be assigned directly in ZBrush, but the Texture can only
be viewed and edited in ZBrush. Anywehere else it just lookes like a distorted jigsawpuzzle.
After having tried this I changed my workflow to assign UV:s in Maya and then reimporting the model..
It happens quite often that you have to tweak a texure outside of ZBrush
and the automatic UV:s are limiting in that way.
Now there are a new plugin for ZB 3.5 wich can for the first time assign UV:s in a intelligent way and allow editing outside program hence eliminating the export-import step. Again, brilliant! Unfortunately I had not access to this tool at the time.
Putting it all together
We tried hard to get it all ready in time for our last presentation, but fell short on some points. However, the playthrough at least gives you the vision of what the game Mimic would be like if finished. I still think it would be a really fun game if I could make it in 3D and implement all of the features I have in my head.
Maby one day I will eh?
Here is a playthough of the first 2 levels. I hope you like it!
Download the Java-game Mimic
![]()
Lessons learned
I can´t see myself stopping using it ever.
As we lost members during the project it became harder. We managed to get a working game in the end, but it´s a big risk to have only one Graphical Artist in the team.
I really enjoyed the work and the creative freedom and feeling of trust from the others. But there were times when I felt stressed out because I could not really turn to anyone for help.
I am looking forward
to future projects.
The ideas become real, and in a lot of cases the only limitation is your own lack of imagination, skills or teamwork.
Thank you for reading!
Best regards,
Gabriel Pettersson 2010